Easy Ways To Automatically Upload Zoom Recordings To Google Drive
Advertisement
Okay, be honest… How many Zoom recordings are just... sitting there? On your desktop. In your “Downloads” folder. Maybe even somewhere weird like your “Documents > Untitled > Folder (1) > Zoom Backup” directory?
Zoom does a great job of recording your meetings. But organizing them afterward? That's where it all kind of falls apart. But guess what? With a few tweaks, you can automatically upload Zoom recordings straight to Google Drive, without having to remember to do it manually. Whether you’re saving client meetings, virtual classes, training sessions, podcast interviews, or your grandma’s weekly book club—this guide has your back.
First Things First: Where Are Your Zoom Recordings Right Now?
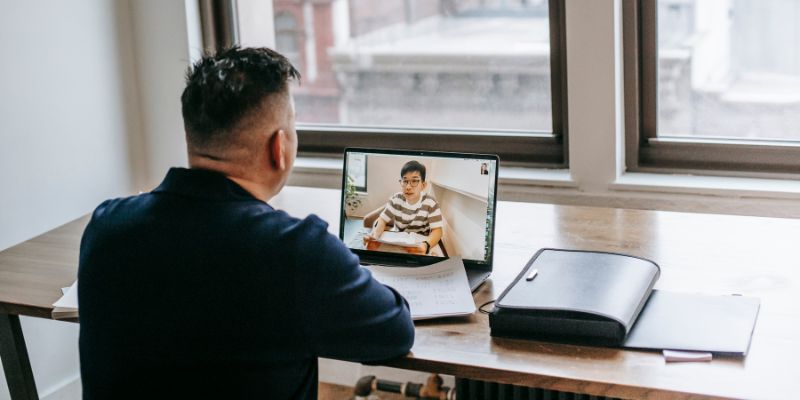
Zoom lets you record in two ways:
- Locally (aka it saves directly to your computer)
- To the Cloud (if you’re using a paid Zoom plan)
Why does this matter? Because the way you upload to Google Drive depends on where the recordings start.
Local Recordings (Free Plan or Desktop Save)
By default, Zoom stores these files in:
Windows:
C:\Users\[Your Name]\Documents\Zoom
Mac:
/Users/[Your Name]/Documents/Zoom
Every time you record, Zoom creates a folder with the meeting’s date and name. Inside that folder? You’ll find .mp4 (video), .m4a (audio), and maybe some .txt (chat transcripts). It’s all there... just waiting for you to do something with it.
Cloud Recordings (Paid Zoom Plans)
These recordings get saved online in your Zoom account. You can access them at zoom.us/recording, and you get a nice web player with sharing options and timestamps. Fancy stuff.
Cloud recordings are easier to automate (spoiler alert), but we’ll show you how to make it work either way.
Option 1: Use Zoom’s Native Integration With Google Drive (Cloud Recordings Only)
Yep, Zoom does have a native integration with Google Drive—but here’s the catch: it’s only available through Zoom Marketplace and only works with Cloud Recordings.
Here’s how to set it up:
Step 1: Go to marketplace.zoom.us
- Log in with your Zoom account.
- In the search bar, type “Google Drive”.
- Click on the Google Drive for Zoom app.
Step 2: Install and authorize
- Click Install.
- It’ll ask for permissions (yes, a bunch of them).
- Authorize both Zoom and Google Drive access.
Step 3: Customize your settings
Once the app is connected:
- Choose the Zoom folder you want synced.
- Pick your target Google Drive folder.
- Set triggers like “upload every new cloud recording” or only specific meeting types.
Once it's set, every new Zoom cloud recording will pop into your Drive like magic. 🪄
Option 2: Use Zapier To Automate It (For Cloud or Local Recordings)
Okay, so Zapier. If you’re not familiar, it's an automation tool that connects two services together and lets them talk.
Zapier can watch for new Zoom recordings and automatically upload them to Google Drive. Pretty cool, right?
Here’s what you’ll need:
- A Zoom account (obviously)
- A Google account with Drive
- A free (or paid) Zapier account
Zapier + Cloud Recordings
This is the easiest version.
Step-by-step:
- In Zapier, create a new Zap (that’s what they call their automation flows).
- Set the trigger as: App: Zoom → Event: New Recording
- Connect your Zoom account.
- For the Action: App: Google Drive → Event: Upload File
- Choose your target folder in Google Drive.
- Set the file name (Zapier can pull the meeting topic and date).
- Turn on the Zap.
And boom—you’ve got automatic uploads every time you end a cloud-recorded Zoom meeting. It’s like hiring a virtual assistant without actually paying one.
Integrating Zapier and Zoom Local Recordings
Now, if you don’t use Zoom’s cloud recording (free plan users, this one’s for you), you’ll need a little more elbow grease.
Zapier can’t “see” your computer’s local folders on its own. But with a combo of Zapier + Google Drive desktop app + Folder monitoring, it’s totally doable.
Here’s how:
- Install the Google Drive desktop app on your computer
- This creates a Google Drive folder that syncs to the cloud automatically.
- Set your Zoom recordings folder to sync
- Move or copy your Zoom recordings folder into the Drive sync folder.
- OR change Zoom’s settings to record directly into your synced Drive folder:
- Open Zoom > Settings > Recording > Change “Location” to your Google Drive folder.
- Every time a new meeting ends and gets saved, it will now appear in your synced Drive—no manual dragging required.
- Optional: Use Zapier to do follow-up stuff like:
- Send a Slack message or email with the file link
- Add a row to Google Sheets for tracking
Now you’ve got a whole system running without you having to move a finger (after setup, of course... it’s not magical).
Bonus Option: Use Google Drive API or Scripts (For Nerds Only)
This one’s for the tech-savvy folks who like a challenge. If you know how to use Google Apps Script or have a dev on your team, you can:
- Create a script to monitor a folder on your system
- Auto-upload new files to Google Drive
- Add naming conventions, date stamps, or folder sorting logic
It’s super customizable, but definitely not plug-and-play. If you’re thinking, “Huh? Script what?”—skip this and stick to Zapier.
(But if you're curious, yes... it's awesome when it works.)
Why Automate Zoom to Drive Anyway?

Good question. Besides the obvious “I don’t want to keep doing this manually,” automating your uploads means:
- You don’t lose important files (we’ve all been there)
- You can access recordings from anywhere, not just your work computer
- You stay organized without building 20 folders and renaming every file
- You can share faster—just grab the Drive link and go
If you’re a coach, educator, freelancer, or just someone who’s on Zoom a lot... this saves time, effort, and honestly, sanity.
Common Issues With Saving Zoom Recordings (And How To Avoid Them)
Let’s be real—things break. Here’s what to watch out for:
Your Drive is full
Google Drive gives you 15GB for free. Zoom recordings can eat that up fast—especially if you record in HD. Clean up old files regularly or upgrade your storage plan.
Zapier free plan limits
If you’re on the free version of Zapier, you're limited to 100 tasks/month. If you’re doing tons of meetings, you might hit that cap quickly.
Slow sync = files not uploading
Especially if your internet is meh. Let your computer finish syncing before you close your laptop. Otherwise, that upload may never happen.
Final Thoughts
Zoom recordings are valuable. But if they’re just sitting there on your computer (or in a random folder), they’re not doing much good.
Set up the automation once—whether it's through Zoom's native tools, Zapier, or just syncing your folders with Google Drive—and you’re golden.
Seriously. Let the robots do the boring stuff. You’ve got more important things to do.
On this page
First Things First: Where Are Your Zoom Recordings Right Now? Local Recordings (Free Plan or Desktop Save) Cloud Recordings (Paid Zoom Plans) Option 1: Use Zoom’s Native Integration With Google Drive (Cloud Recordings Only) Step 1: Go to marketplace.zoom.us Step 2: Install and authorize Step 3: Customize your settings Option 2: Use Zapier To Automate It (For Cloud or Local Recordings) Here’s what you’ll need: Zapier + Cloud Recordings Step-by-step: Integrating Zapier and Zoom Local Recordings Here’s how: Bonus Option: Use Google Drive API or Scripts (For Nerds Only) Why Automate Zoom to Drive Anyway? Common Issues With Saving Zoom Recordings (And How To Avoid Them) Your Drive is full Zapier free plan limits Slow sync = files not uploading Final ThoughtsAdvertisement
Related Articles
Apple Notes Review: How It Stacks Up Against Rivals

Explore How to Interact with Your Documents Using Google's AI-powered NotebookLM

How to Use JustCall and ChatGPT for Smarter Customer Service?
How to Use Reflector 3 and Get 7 Screen-Mirroring Alternatives

A Beginner’s Guide to Wondershare DVD Slideshow Builder Deluxe

How to drive more conversions from your events with Addevent

Discover the Benefits and Uses of SimpleTix for the Event Ticketing Process
How to Convert WMV Files to SWF Format Easily

Top 8 OnePageCRM Sales Strategies to Close More Deals in 2025

Microsoft To-Do automation can simplify your daily planning
Everything You Need To Know About Google Docs Pageless View

 novityinfo